In the previous post, we went through what is leap and its usecases for it. This post will go through the steps of configuring Nutanix Leap to protect VMs between two Nutanix clusters.
Step (0): Prerequisites
- Configure Data Service IP for all clusters
- Open certain ports in Prism Central and DR – Leap sections
- NGT must be installed
- Check VM OS compatibility
- Create production and test virtual networks at the primary and recovery sites.
Step (1): Enable Leap
Deploy Prism Central if not already deployed one in each site.
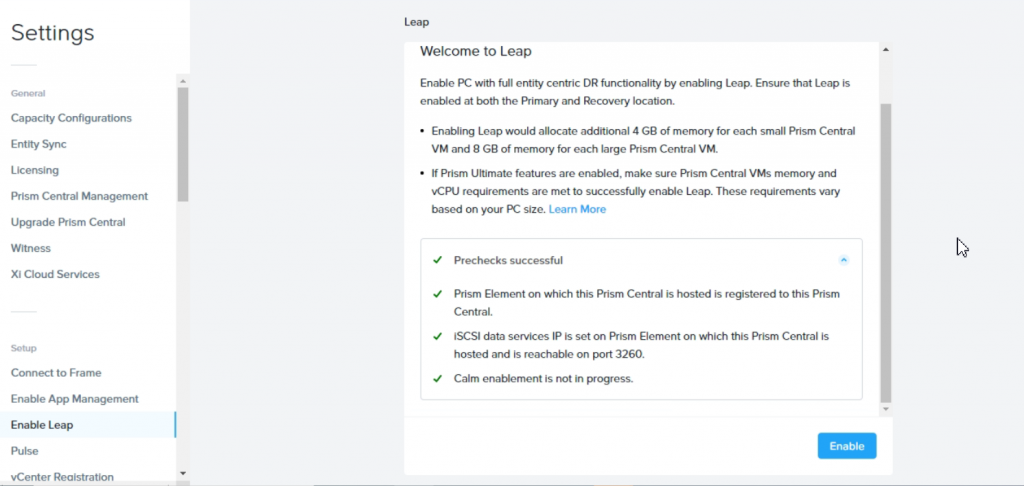
wait for Prechecks finishes > Enable
The setup will start and will hot add 4 GB of memory to (small) PC
Step (2) Configure Availability Zone
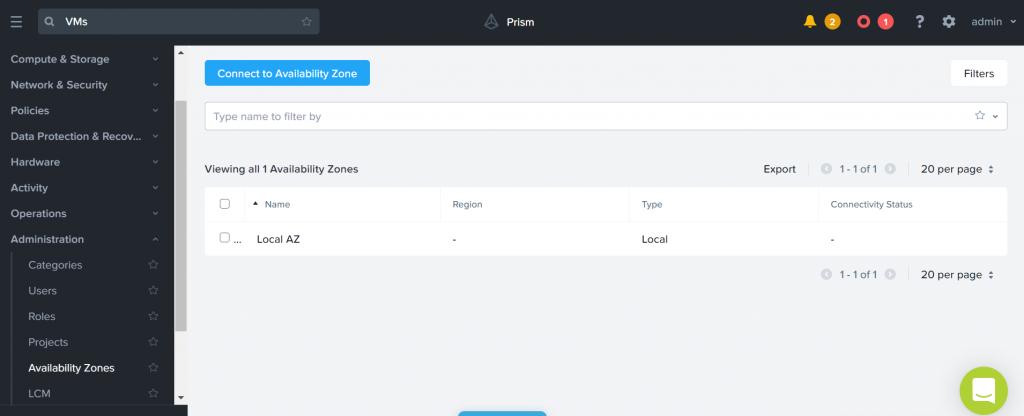
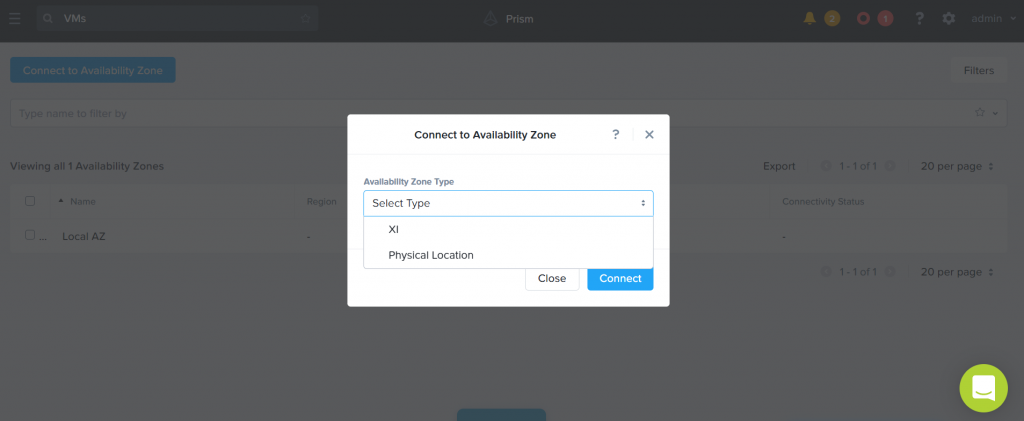
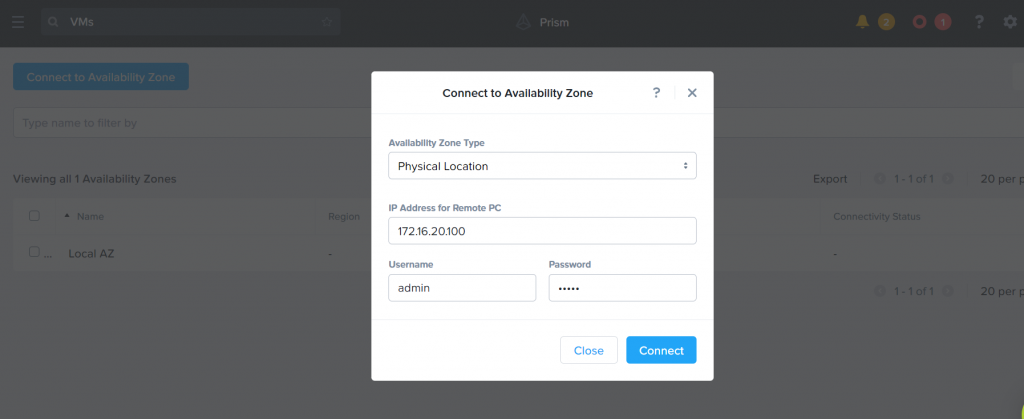
You don’t need to do the same steps from the remote site (DR Site), AZ will be added automatically in the remote PC.
Step (3): Create Protection Polices
we need to create a Protection Police that contains source and destination AZ, and schedule


Linear vs. roll-up retention
Use linear policies for small RPO windows with shorter retention periods or in cases where you always need to be able to recover to a specific RPO window.
Use roll-up policies for anything with a longer retention period. They’re more flexible and automatically handle snapshot aging / pruning while still providing granular RPOs for the first day.
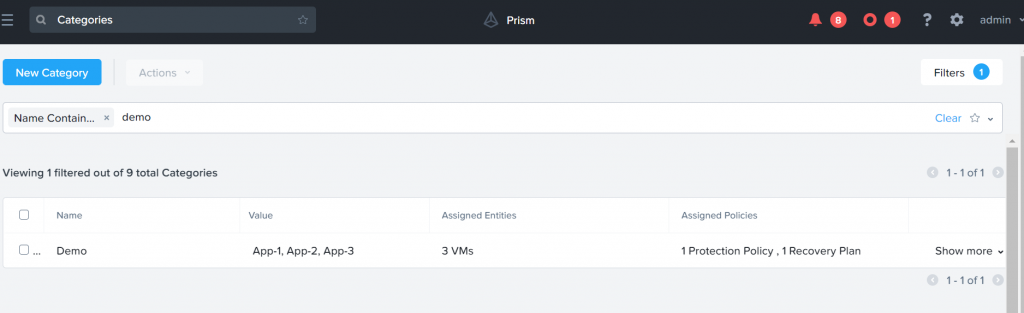
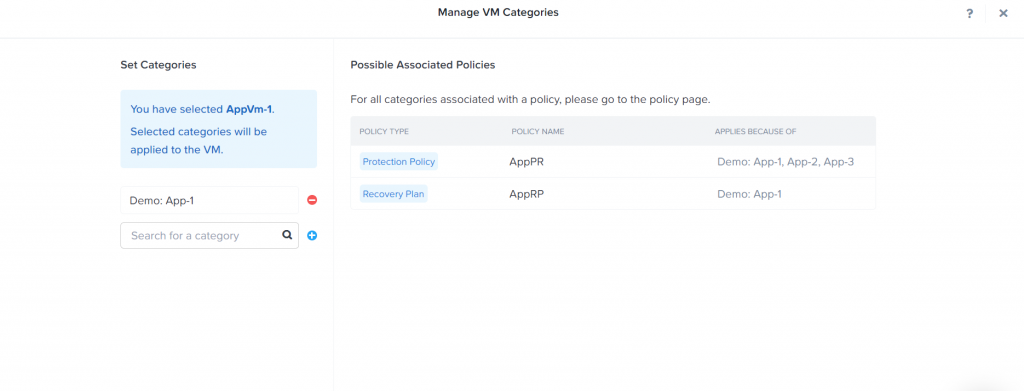
Add Entities to be part of this Protection Policy, by selecting categories
This enables automatic protection of VMs that is staged in this category instead of protecting VMs individually.

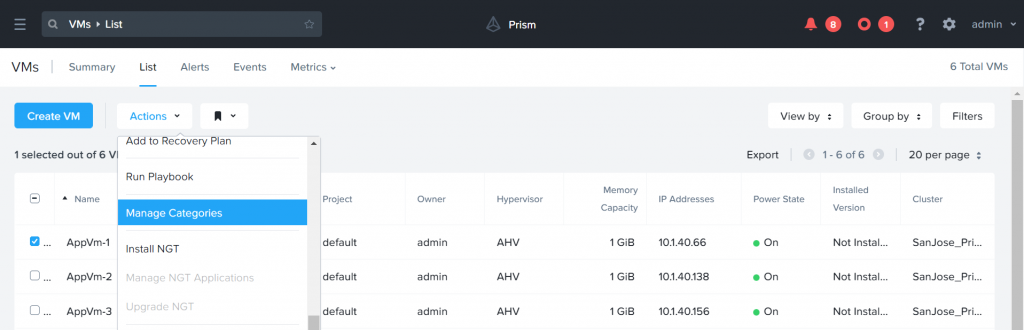
Step (4): Protect VMs
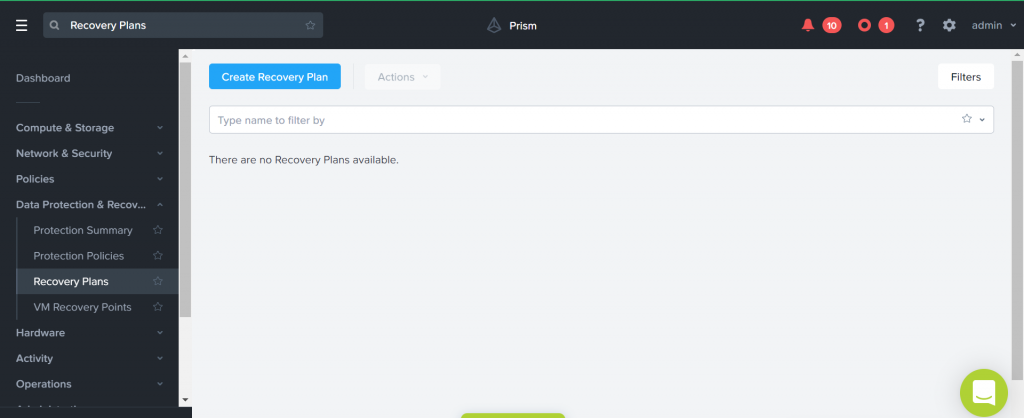
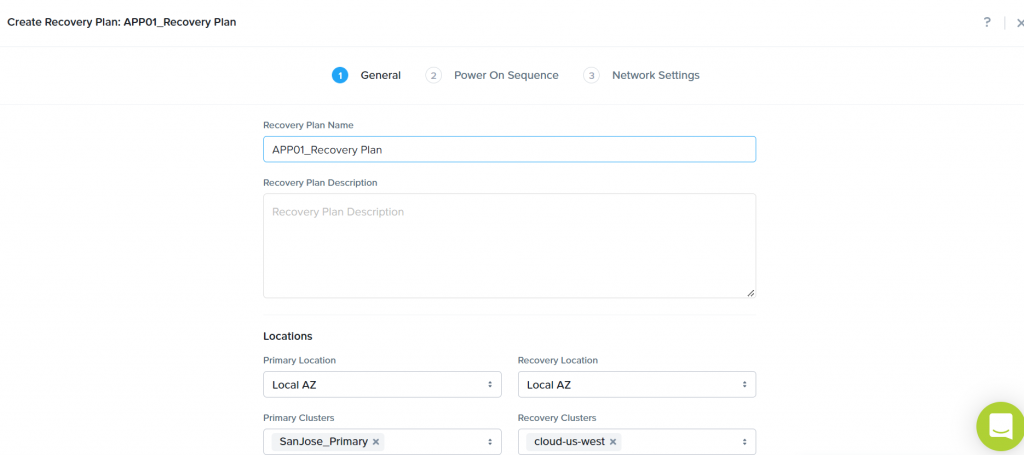
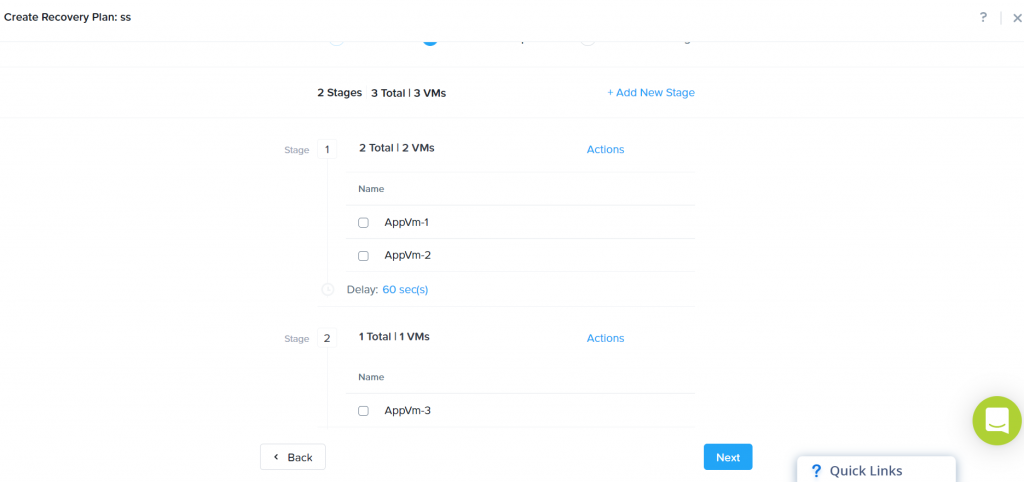
Step (5): Create a Recovery plan at the primary site
To orchestrate the failover (disaster recovery) we need to create Recovery Plan.
Give your Recovery Plan a Name and Description
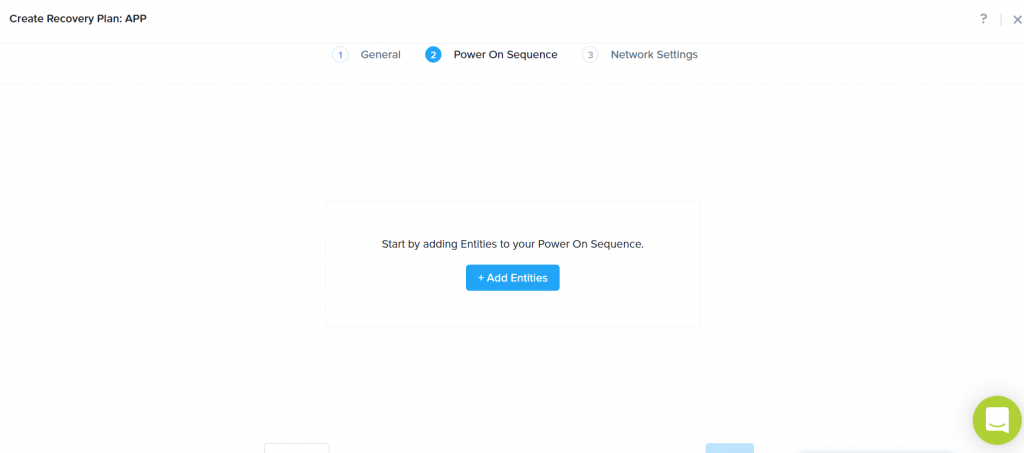
The next page is Power-on Sequence where we need to + Add Entities in different stages and specify an order list of stages and add VMs to those stages,
Select the VM’s that will be on the first stage and click Add
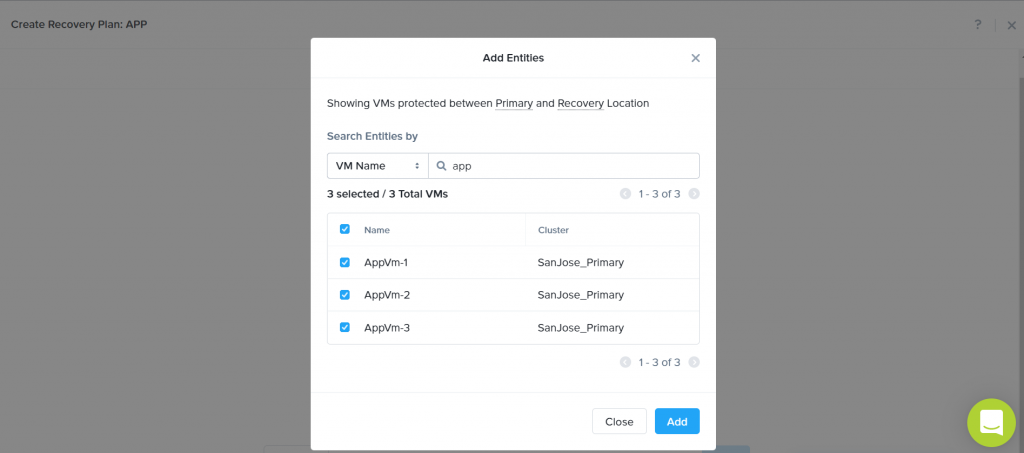
After adding VMs in Stage-1 we go back to Power-On Sequence page, add new Stage
Select the VM’s that will be on the first stage and click Add.
Now we have two Stages, now we can add a delay between two stages, by clicking the + Add Delay
Next page is network mapping

If NGT is installed we can add IP address mapping (Leap will go ahead and change IP for each VM depending on network its connected)
VM failover (Planned and Un-Planned Failover)
Available action for a Recovery Plan
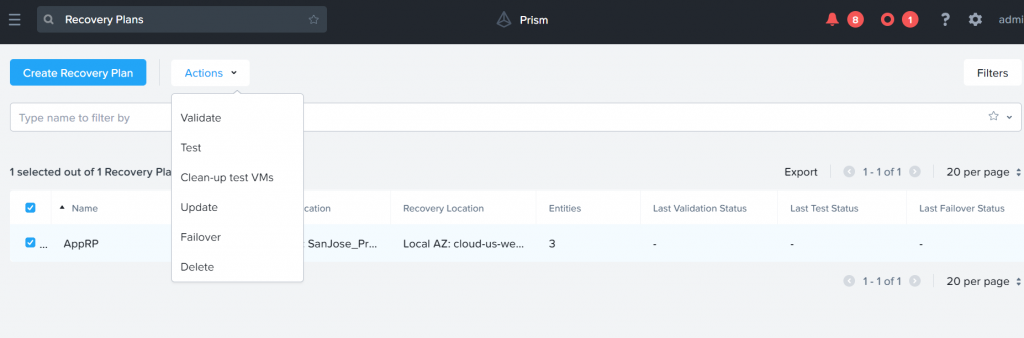
| Validate | Validates the recovery plan to ensure that the VMs in the recovery plan have a valid configuration and can be recovered. |
| Test | Tests the recovery plan. |
| Clean-up test VMs | Cleans up the VMs failed over as a result of testing recovery plan. |
| Update | Updates the recovery plan. |
| Failover | Performs a failover. |
| Delete | Deletes the recovery plan. |
Test failover: To ensure that the protected guest VMs failover efficiently to the recovery site, you perform a test failover. When you perform a test failover, the guest VMs recover in the virtual network designated for testing purposes at the recovery site. However, the guest VMs at the primary site are not affected. Test failovers rely on the presence of VM recovery points at the recovery sites.
Planned failover: To ensure VM availability when you foresee service disruption at the primary site, you perform a planned failover to the recovery site. For a planned failover to succeed, the guest VMs must be available at the primary site. When you perform a planned failover, the recovery plan first creates a recovery point of the protected guest VM, replicates the recovery point to the recovery site, and then starts the guest VM at the recovery site. The recovery point used for migration is retained indefinitely. After a planned failover, the guest VMs no longer run at the primary site.
Unplanned failover: To ensure VM availability when a disaster causing service disruption occurs at the primary site, you perform an unplanned failover to the recovery site. In an unplanned failover, you can expect some data loss to occur. The maximum data loss possible is equal to the least RPO you specify in the protection policy, or the data that was generated after the last manual recovery point for a given guest VM. In an unplanned failover, by default, the protected guest VMs recover from the most recent recovery point. However, you can recover from an earlier recovery point by selecting a date and time of the recovery point.
At the recovery site, the guest VMs can recover using the recovery points replicated from the primary site only. The guest VMs cannot recover using the local recovery points. For example, if you perform an unplanned failover from the primary site AZ1 to the recovery site AZ2, the guest VMs recover at AZ2 using the recovery points replicated from AZ1 to AZ2.
Monitoring: Dashboard Widgets
To view these widgets, click the Dashboard tab.


Solutions Architect – Cloud & Infrastructure