In an earlier blog, We’ve defined Nutanix business contonuity DR solution. Today’s blog will showcase vStore protection domain with a low RPO 20-59 seconds. A vStore is a separate mount point within a storage container on an ESXi cluster. you can have same or different vCenter Server. Based on the specified RPO, the schedule creates a stream of lightweight snapshots for the preceding 15 minutes. lets start configuration guide…
Map replication site
- Connect prism for both clusters Site A and Site B
- Go to storage dashboard
- Click the Remote Site tab and add remote site

Create a new (20-59 seconds) Replication PD
- Connect prism for both sites clusters
- Go to the storage dashboard
- Create a storage container on both clusters with the same name ex. D****VMNAME
- Login to vCenter and create a VM on Site A cluster and use the same storage container created in step 3
- Create VStore PD using the vstore protect command
a. Connect to Site A NTNX cluster IP prism
b. Create a normal PD
c. Connect via SSH to Site A NTNX cluster IP
d. run vstore protect command as below with PD created earlier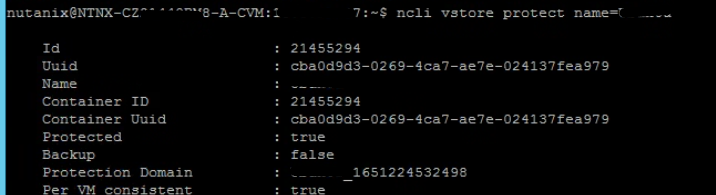
e. using prism update VStore PD in Schedule tab, now every second is avilable.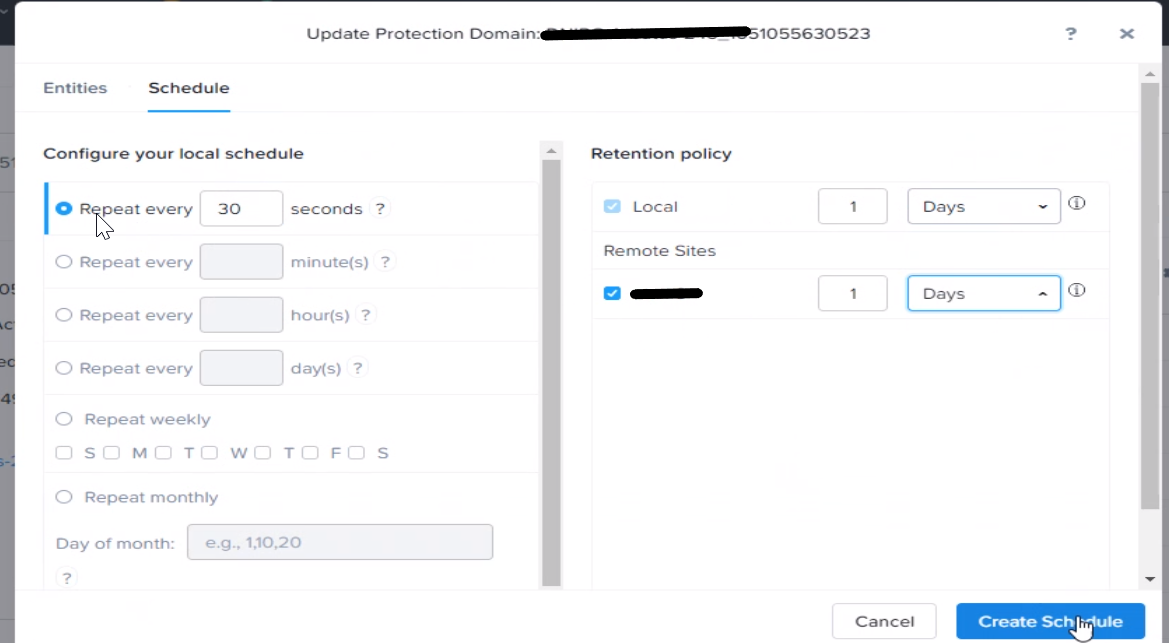
f. Click Create Schedule. - Pause running replication
*to update storage mapping we need to stop replication KB
a. Connect via SSH to both NTNX cluster IP of Site A and Site B
b. Check status of replication
c. nutanix@cvm:~$ ncli pd ls-repl-status
d. suspend all Protection Domain Schedules,
e. nutanix@cvm:~$ for i in ncli pd ls | grep ‘Protection Domain’ | awk ‘{print $4}’; do echo $i && ncli
protection-domain suspend-schedules name=$i ; done - Create vstore storage mapping
- Connect prism for both clusters cluster IP of Site A and Site B
- Go to Data Protection dashboard > table > Remote site
- Select remote site > click on update bottom
- In vstore mapping section create mapping
- Resume replication
a. Connect via SSH to both NTNX cluster IP of Site A and Site B
b. Resume all Protection Domain Schedules,
c. nutanix@cvm:~$ for i inncli pd ls | grep 'Protection Domain' | awk '{print $4}'; do echo $i && ncli
protection-domain resume-schedules name=$i ; done
d. Check status of replication
e. nutanix@cvm:~$ ncli pd ls-repl-status
Planned failover Procedure
- Shutdown VM from prism or vCenter
a) Connect via SSH to NTNX cluster IP where VM is running
b) List all Protection> ncli pd list |grep Domain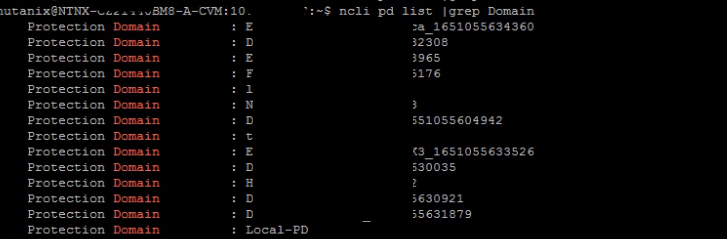
c) PD name is VM name-unique id
d) Migrate a PD> ncli pd migrate name=”pd_name” remote-site=”Site B”
- Migrate command does the following operations:
a) Creates and replicates a snapshot of the protection domain.
b) Shuts down VMs on the local site.
c) Creates and replicates another snapshot of the protection domain.
d) Unregisters all VMs and removes their associated files.
e) Marks the local site protection domain as inactive.
f) Restores all VM files from the last snapshot and registers them on the remote site.
g) Marks the remote site protection domain as active - We have noticed that Steps b, d, and f sometimes will not be executed, you may need to do it from vCenter
- Check PD is active from prism

- After failover revers replication schedule need to be created
- Follow same steps as before
Unplanned failover Procedure
- Connect using SSH to backup NTNX cluster IP (Site A or Site B)
a) activate it> ncli pd activate name=”pd_name”
- Activate command does the following operations:
a) Restores all VM files from last fully-replicated snapshot.
b) Registers VMs on recovery site.
c) The VMs are not powered on automatically. You need to manually start the VMs.
d) Marks the failover site protection domain as active.
Delete vStore PD Procedure
- Shutdown VM or migrate it to default datastore (Site A or Site B)
- Connect via SSH to both NTNX cluster IP of Site A and Site B
- List all Protection> ncli pd list |grep Domain
- Get PD name is VM name-unique id
- Remove a PD
- > ncli pd deactivate-and-destroy-vms name=PD_NAME
a. If any error for existing Snapshoots or schedule, login to
prism and delete it - > ncli pd remove name=PD_NAME
Thats was a long one, hope this will help if your application BC requirements is less than 1 minute.

Solutions Architect – Cloud & Infrastructure